Triumph Rat Motorcycle Forums banner

Replacing drive chain on gearbox sprocket on assembled engine

5.5K views 51 replies 14 participants last post by  Hermit47  
#1 ·
Having the drive chain fall off the gearbox sprocket is a situation which doesn't come up often because, well, we try our best to avoid that. But let's face it, every once in a while, s___t happens.

Has anyone hit upon a clever method to easily replace the chain on the gearbox sprocket? I'm talking about when the primary chaincase is fully assembled. (Put that coat hanger away, it's not going to help).
 
#3 ·
With the gear box in neutral and preferably having the chain off the rear sprocket (to allow for plenty of chain to feed forward) put the chain on the sprocket teeth and rotate the sprocket forward until the chain is visible dangling below the case. At that point , I use this tool that I made from an old gun cleaning rod to slip neatly into the open hole on the link and draw the chain through. The trick is to not let the weight of the chain turn the drive sprocket back resulting in the chain falling off. So tool in one hand, feed the chain on the sprocket until its dangling and hook it, then pull through.
Works for me!
Image
 
#6 ·
Dang! There's my problem right there - i was using a wooden coat hanger! :(

Happyfeet - yes, i can see how that hook would be useful once the chain was engaged by the sprocket. What i'd really like to find is an easy, non-finger crushing way to get the chain around the sprocket. Probably no magic bullet, but people sometimes come up with really clever ideas.

Anyone else?
 
#8 ·
Well, I will admit it has been some time since I have looped a chain. A quick look at my 69 TR6R and with the chain guard in place, getting it started would be challenging. If you can get a link to catch on the sprocket and move the sprocket with a tool similar to what I pictured, feeding the chain by hand, until the chain dropped down would work.
Perhaps another idea would be some very thin wire attached to the chain and fed through the housing. Get the chain started on the sprocket and pull the wire and chain on through. Is your chain guard in place? Are you working from a lift table or on your floor? When I rebuilt my basket case 69' T120R, I do recall putting the chain guard on the swing arm before putting the rear wheel on, so I know I've been where you are right now. I think if you would have the chain guard up and out of the way, you would have better luck finding a way. I just know that the tool I made , made the job easier, and probably the chain guard was in place but not bolted down.
 
#10 ·
Hi Rick -
When i take a chain off for cleaning (every 500-1,000 miles depending on how much gravel road riding) i always attach an old chain so i can pull the clean chain back through.

But if the second chain (or the short chain length you propose) happens to slip off the sprocket - OR, after reinstalling the engine in the frame i forget to put a chain on before closing the trap door and installing the clutch/transmission - THAT'S when i find myself in a real pickle.
 
#11 ·
HappyFeet - removal of the chain guard (rear wheel, brake rod), and/or of the engine mounting plate/brake rod definitely help, but i'm thinking worst case scenario - all-dressed - the full Monty (clashing similes!).

In my experience, anything "limp" (such as fine wire, string, etc) quickly find their way into a crevice on one side or the other of the sprocket and jam themselves in there.

I have tried fashioning a curve into a metal coat hanger and use it to "fish" the chain around - from both ends. I had no joy with that and the coat hanger did have a tendency to wedge itself between the sprocket and casing.

Did anyone else read the story of the mouse that was "tidying up" the bench in some fellow's shed? Perhaps outfitted with coveralls and suitably trained, a mouse could accomplish the feat, though i have to say any flesh in the vicinity of the turning chain and sprocket is in great peril. Ah! the better mouse trap!

Well, i suspect there is no perfect solution to this problem. But you never know - someone, somewhere may have come up with some technique that would never have occured to me.

Cheers!
 
#13 ·
Except oil will attract dirt. Better to use chain wax.
A 3/8" square bar will give you a rail to slide the chain on up the the sprocket. Once on the sprocket you can use the kick lever to rotate the sprocket (plugs out). A flat bar with a curved bend at the end can be used to push the links down around the sprocket.
 
#18 ·
Hi Stuart,

Interesting theory of Scottoilers' operation - especially the intake/exhaust cleansing aspect you describe.

I had a quick look around the web for Scottoilers reviews/info. It was fairly instructive.

One source claimed they worked great on dusty gravel roads, but otherwise there seems to be a broad concensus that Scottoilers do not perform well "off-road", i.e. off pavement.

For road riding there's pretty much universal praise, although reliability can sometimes be an issue apparently.

But if i had to turn off my chain oiler each time i got on a gravel road, as suggested by most sources, that would pretty much be a deal breaker.

Additional complexity and reliance issues of a vacuum/electric system would be negatives for me, although if it worked for my applications i'd consider it for sure. What's not to like about minimal chain maintenance requirements?

Regarding the self-cleaning effect you described Stuart - that description appeared in one source (see below), but from what i read, increased cleanliness of the chain is mostly a result of the absence of copious amounts of "sticky" lubricants - which pretty well describes my bar-oil routine. Perhaps that's the reason there's so much grit in my chains - there certainly is a logic to that.

I did notice that all the installations described in the reviews have the oil dispenser attached on one side of the chain, not down the middle. I wonder if the ones i looked at are unlike Stuart's.

===========================
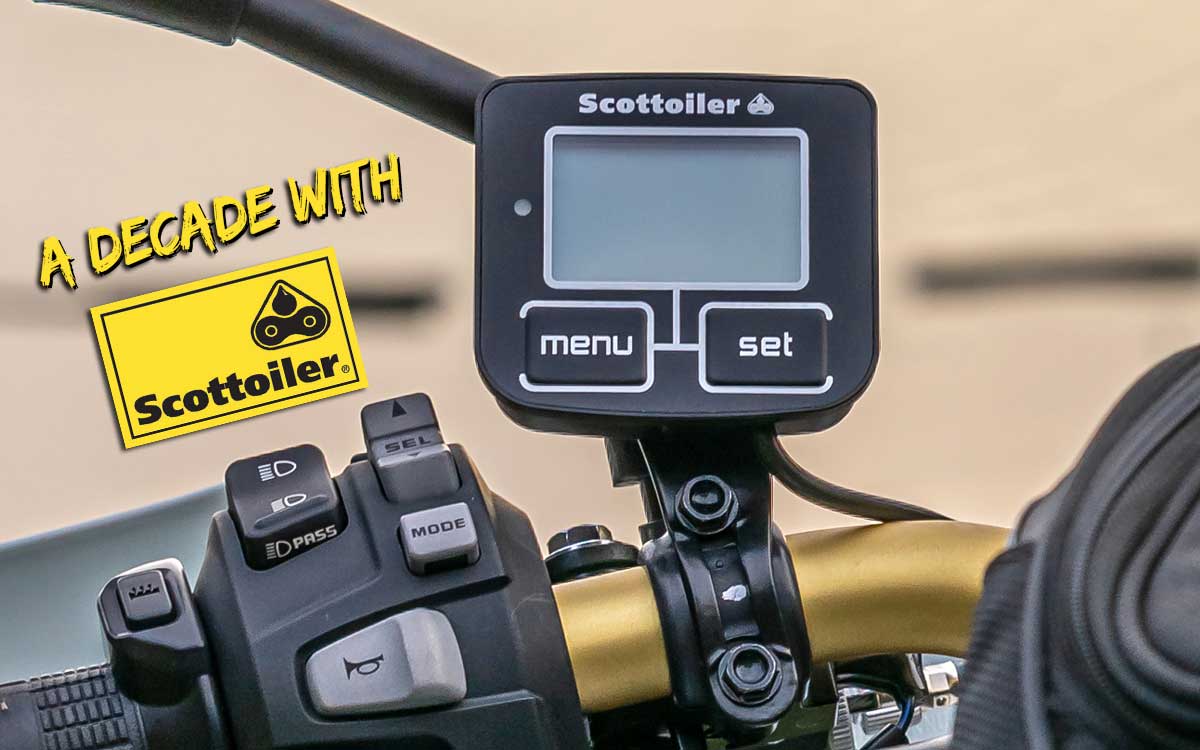
From "A Decade with Scottoiler"

"I still check chain adjustment and such, but consistent and automatic chain lubing seems to keep the chain from falling out of adjustment. And I love the Scottoiler for that reason, it makes long rides easier. However, I am very much aware that an oily chain and off-road dust do not mix well, creating an abrasive paste. The saving grace is you can turn the system off well before arriving at a dirt destination."

"Prolonged chain life (when turned off during dirt sorties)"

==========================
From: "Tested: Scottoiler xSystem automatic chain oiler review"

"Oil is fed to one side of the chain, but it finds its way onto both O-rings"

"Depending on how you set the flow rate, you’ll get around 1,000 to 1,500miles between fills, so the 250ml bottle, which costs just £5.48 to replace, will last between 4,000 and 6,250miles – a good year for the average rider."

“I have the standard single-tip dispenser and am amazed at how clean it keeps everything, even on dusty gravel roads."

==========================
From: Scottoiler V-system—An Auto-oiler Overview

"Scottoiler oil isn’t sticky, so it flushes away dirt instead of attracting it"

"In my opinion, auto-oilers may be worth it, provided they work properly. If you’re riding long distances and/or you ride a lot of tarmac, even better. Consistent dirt roads may prove to be too much for the oilers to keep up, which is why many off-roaders stick to the tried-and-true grunge brush and cheap gear oil method."

"Some complaints and observations indicate that an auto-oiler is not ideal off pavement (Suggestions are to either turn the oiler off and manually clean and lube, or turn it up for extra drips. Dave’s experience proves they work fine on dual-sports.)"
==========================

Cheers!
 
#19 ·
Hi Bruce,
Interesting theory of Scottoilers' operation
Having been using one Scottoiler for over thirty years, and opened up split-links, I can say a Scottoiler "does what it says on the tin".
:cool:

One source claimed they worked great on dusty gravel roads, but otherwise there seems to be a broad concensus that Scottoilers do not perform well "off-road", i.e. off pavement.
Could be different riders' expectations? On-road, I use the lowest delivery setting in the dry, turning it up to "2" in the wet. That allows for several more delivery increases, albeit with more oil on the back of the bike.

if i had to turn off my chain oiler each time i got on a gravel road
would pretty much be a deal breaker.
If absolutely essential, turning off a Scottoiler is turning the delivery controller to zero. Even if that involves putting the bike on the sidestand and getting off, that's a minute tops?

Additional complexity and reliance issues of a vacuum/electric system would be negatives for me
The "complexity" of the vacuum-operated Scottoiler is two tiny hoses:-

. one from pump to delivery tube;

. the other from the carb. manifold to the pump; my T100, I had to drill a hole in the ally manifold and tap it M5, the fitting was supplied part of the kit.

from what i read, increased cleanliness of the chain is mostly a result of the absence of copious amounts of "sticky" lubricants
That's part of it but, by definition, if the Scottoiler is supplying regular droplets, that must end up somewhere, there isn't anything in/on a chain to retain it.

did notice that all the installations described in the reviews have the oil dispenser attached on one side of the chain, not down the middle.
As earlier, as standard, the oil is applied on one side just before the chain turns around the rear sprocket, the chain turning around the sprockets initially pushes the oil into the chain primarily to lubricate between pins and bushes; it's oil escaping after that lubricates between rollers and sprockets. If required, Fraser (Scott) can supply the paranoid with a delivery tube with two outlets, to be aimed at inner sideplates on both sides but, as I say, opening up split-links to check, I've never seen any need for the twin-outlet delivery tube.

I fitted my first Scottoiler to a Japanese bike I was using as a daily rider for a 70-mile round trip. Before I fitted it, chain lubrication and adjustment was a Sunday chore and, if it was raining Monday morning, the chain was washed clean by the time I reached work. (n)

After I fitted it, having checked the chain the first couple of Sundays, I gave up; chain adjustment was one or two flats at oil-change time (every 1500 miles). After I changed jobs and didn't have to ride every day, the bike became one of my small collection; then the advantage of the Scottoiler was no chain cleaning and lubing after use, because the chain had been lubed and cleaned during the ride. I still have the bike and, 32 years later this year, the same chain's still on it, adjusters are a bit over half-way along their travel. (y) Because I've a number of bikes (though a lot less than @mach1970 Rob :cool:) and I don't do a vast mileage on each, I've yet to replace a Scottoiler-lubed chain 'n' sprox.

Hth.

Regards,
 
#26 ·
Greetings - i haven't removed the chain yet - the question was really a hypothetical.

Later this winter when i remove the clutch/transmission i can take out the trap door and experiment with DMadigan's ramp idea. It would be cool to come up with a good technique - it's a situation everyone runs up against eventually.
 
#25 ·
Hi DMadigan, The 3/8 bar is the best idea I've ever heard of. That in conjunction with the hook would be the ticket. As anyone that's ever had to feed chain it, the weight of the chain pulling down is a problem no matter the best hook you can make. Music wire makes a good hook as it's stiff enough to support weight of chain without bending.
Don
 
#28 ·
Hi Andy - right on! - standard operating procedure. What we're discussing is the infrequent situation when at some point during maintenance or reassembly, and in spite of all taken precautions, gravity takes over and the weight of the chain pulls itself off the gearbox sprocket. Over the last 20 years and 80,000 miles this has only happened to me twice that i can remember (once caused by gravity, and once by forgetfulness to install chain before buttoning up the primary after reinstalling the engine in the frame). I'm sure anyone who's played around with these bikes long enough has faced the situation at least once and it'd be great to have an easy solution!
 
#29 ·
Ah, OK, yes Bruce. got you. You, been there too when it went wrong. Just ordered a couple of generic master links so I don't have to use my 'best' ones when pulling the chains on my 2 bikes shortly for a thorough clean.

Don't have Scottoilers but Stuart has set me thinking about the basic one - presume you get the vacuum from the inlet link pipe on the Daytona, but not sure where you'd get the vacuum from on a single carb TR7RV. No doubt he'll enlighten me.
 
#30 ·
Hi Andy,
Scottoilers
basic one - presume you get the vacuum from the inlet link pipe on the Daytona, but not sure where you'd get the vacuum from on a single carb TR7RV.
My T100, although a Daytona engine, has a single carb. 'n' manifold. My vacuum-operated Scottoiler kits included M5- and M6-thread fittings to go in place of an inlet manifold blanking screw. The kits also included a self-tapping fitting for any bike without an inlet manifold vacuum take-off; however, I preferred to drill 'n' tap my T100's (ally) manifold for the M5-thread fitting.

Triumph twin, connecting a vacuum-operated Scottoiler, curiously it might be easier to do a similar drill-'n'-tap - while there is the connecting pipe between the manifolds, it's a considerably larger ID than operates a Scottoiler.

Hth.

Regards,
 
#32 ·
Hi Andy,
Quite capable of tapping an M5 thread, but not sure I want to in original manifolds.
The '67-on T100 single-carb. manifold is rocking-horse poo. But, if the Scottoiler fitting is removed, a 5 mm. threaded hole's hardly difficult for a competent ally welder to fill?

If you don't want to drill "original" T100 twin-carb. manifolds, L.P. Williams currently has two right and two left @ ÂŁ35 each; even with p&p and HMG's cut, that's a damn' sight less than even one final-drive chain 'n' sprox, never mind all the time you'll save not 'maintaining' the chain?

Hth.

Regards,
 
#33 ·
Hi Stuart - you have a point about costs - although at <1000 miles a year on my Daytona it'll be a while before I change the drive train again - although because of a (perceived) gearbox oil leak along the mainshaft splines I'm going to investigate and fit a new sprocket whilst I'm in there. Where did you fit the bottle on your Daytona?
 
#34 ·
Hi Andy,
costs
at <1000 miles a year on my Daytona it'll be a while before I change the drive train again
Mmmm ... if you read the folk remedies on here, you'll know of "must lube chain when it's warm, after a ride". I get home after a ride, especially wet and/or cold, the first thing I want is at least a cuppa; absolutely the last thing I want to be doing is grovelling around beside the final-drive chain, cleaning and/or lubing it ... :rolleyes:

So another of the advantages of a Scottoiler is there isn't any need for any such faffing around, the chain's been lubed during the ride, is already pretty clean. (y) You don't ride the bike during the winter? No problem, the chain was lubed on the last ride, it's ready to go the first warm day of the new year (although with these old heaps, no saying the rest of the bike's in a similar state of readiness ... :cool:).

Where did you fit the bottle on your Daytona?
As I built the bike intending it to be a one-up tourer, I went for an accessory Fraser used to offer - a reservoir that also mounted the standard pump-reservoir, all behind the rear numberplate; rather than drill holes directly in the mudguard, I bolted an ally plate to the standard numberplate brackets and drilled Scottoiler mounting holes in that (also, knowing Brit twins' rear 'guards can ... errr ... vibrate a bit ... I rubber-mounted the Scottoiler :cool:). Was a bit spendy but, if either the bike concept or the mounting required a rethink, no holes in the bike's bits to fix. Unfortunately, checking the Scottoiler website, I see that behind-the-numberplate reservoir's been replaced with the https://www.scottoiler.com/products/accessories/traveller-expansion-bag/ ... I'll have to have words with Fraser (assuming he hasn't retired to his own private Caribbean island since the last time we spoke ...).

Otoh, the first Scottoiler I fitted, on the aforementioned Japanese bike, I just ziptied the pump-reservoir to the angled frame tube down from the drive-side rear shock. mount - the kits included a moulded plastic "seat"(?) piece that fitted between a frame tube and the cylindrical pump/reservoir so the ziptying was secure. (y)

Hth.

Regards,
 
#40 ·
Hi Andy,
So another of the advantages of a Scottoiler is there isn't any need for any such faffing around, the chain's been lubed during the ride, is already pretty clean. (y) You don't ride the bike during the winter? No problem, the chain was lubed on the last ride, it's ready to go the first warm day of the new year (although with these old heaps, no saying the rest of the bike's in a similar state of readiness ... :cool:).
FWIW, pushed the button and just fitted the basic V series oiler to my 2015 Hinckley Bonnie. Straightforward enough - even if I didn't find the instructions until I'd fitted it. Really cleaned the chain and sprockets well with paraffin and it all looks very tidy. Still not sure I want to fit one to my classics but I could get new manifolds and drill and tap vacuum take-offs in them.
 
#37 ·
I was a bit on my toes after removing the drive chain completely while doing a major brake overhaul on my T140D.
Now the chain is back on the bike. If I had luck or not I don't know, but I didn't find it difficult to do.

With the chaincase and left sidecover removed:
  • Stuck a small bit of wood under the rear wheel so it wouldn't rotate
  • Smeared some grease on 15-20cm of the feed end of the chain
  • Laid the chain over the rear sprocket so I could feed it a few links at a time towards the front sprocket
  • With my fingers (I don't have piano fingers!) I reached in and fed the chain slowly onto front sprocket, while giving slack over the rear sprocket.
  • The chain would "glue" itself to the front sprocket, so I could see it coming around to the underside
  • Used a bit of string (see post #3) to catch the chain and move it further
  • Put the connecting link on after having both ends resting on the rear sprocket

I may have had a bit of luck, and in my basement it was only 8 to 10 centigrades, so the chain wasn't too loose.

Helge.
 
#38 ·
I was a bit on my toes after removing the drive chain completely while doing a major brake overhaul on my T140D.
Now the chain is back on the bike. If I had luck or not I don't know, but I didn't find it difficult to do.

With the chaincase and left sidecover removed:
  • Stuck a small bit of wood under the rear wheel so it wouldn't rotate
  • Smeared some grease on 15-20cm of the feed end of the chain
  • Laid the chain over the rear sprocket so I could feed it a few links at a time towards the front sprocket
  • With my fingers (I don't have piano fingers!) I reached in and fed the chain slowly onto front sprocket, while giving slack over the rear sprocket.
  • The chain would "glue" itself to the front sprocket, so I could see it coming around to the underside
  • Used a bit of string (see post #3) to catch the chain and move it further
  • Put the connecting link on after having both ends resting on the rear sprocket

I may have had a bit of luck, and in my basement it was only 8 to 10 centigrades, so the chain wasn't too loose.

Helge.
I find the old steel coat hangers bent to shape with a hook make an excellent chain hooker
 
#42 ·
Hi Bruce,
wrist fracture
:( Commiserations ...

Many years ago, I was knocked off a bike, went to A&E with a painful wrist. As it was a weekend and the specific orthopaedic surgeon wasn't on duty, the A&E doc decided to plaster the wrist, on the basis he couldn't be sure nothing was broken and there's a particular wrist bone that, if broken and not immobilised, causes many problems later. I was also given an appointment with the orthopaedic surgeon during the following week; he took one look at the X-rays and pronounced the wrist unbroken. (y) So I only spent a few days with wrist in plaster but, grief, that was a monumental pita ...

Get Well Soon.

Regards,
 
#43 ·
How long before you have the hacksaw out Hermit to facilitate a little more movement ? In respect to the thread then I would sponsor the attach the old chain to the new chain and pull it round. Putting a broken chain back on in the middle of nowhere ?? Honestly.... unless you are having the luckiest of lucky days (and if I was I would probably rather win the lottery) I feel it would probably be quicker to take the primary cover and clutch off etc. to refit the chain or better still carry a mobile and ring for the recovery :). If someone on the forum develops a suitably cunning plan then we might all buy one
 
#44 ·
if i have a bare gearbox sprocket i put the box in neutral and lay the new chain along the top of the swingarm and rear sprocket. then i poke the end over the top of the gearbox sprocket with one hand while turning the sprocket from below with my other hand until the chain catches a tooth.

i continue turning the gearbox sprocket until the chain hangs down a bit in front, tuck it under towards the rear and pull the rest around.

this only takes a minute.
 
#49 ·
MPH -
I think everyone with an abiding affection for old Brit bikes must have at least a little Luddite blood flowing in their veins. The ten years i lived here in the woods with no electricity, running water, vehicle, or phone were the very best years of my life. To date, anyway - something big might be coming for all i know.

Cheers!
 
#50 ·
MPH -
I think everyone with an abiding affection for old Brit bikes must have at least a little Luddite blood flowing in their veins. The ten years i lived here in the woods with no electricity, running water, vehicle, or phone were the very best years of my life. To date, anyway - something big might be coming for all i know.

Cheers!
My little brother spent almost 10 years doing the same Hermit . He was on a little island which I think was just between Seattle and Vancouver. He is good company around the dinner table, he can tell some tales.