Triumph Rat Motorcycle Forums banner

Legend TT 99 repair

33K views 245 replies 23 participants last post by  SzBalogh 
#1 ·
Greetings!

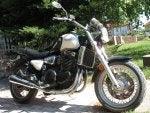
My Legend TT 900 was standing for 15, now trying to recover it.
Cylinder head leaking coolant at the back and left side, radiator is also leaking and oil was diluted with gas. Third carb butterfly valve not turning. Gummed gas all ower the carbs. Gas tank contained half liter solid rust.
After reading some topics and articles decided to replace the head gasket. This is however really expensive... considering the other repairs still need to be done. Then, luckily, i found this "When to retorque head bolts?" topic here containing vital informations.
First, they should be retorqued? I missed it, my ride has only 5k miles. I will give it a try tomorrow.
Second, the head bolts can be reused! Any more confirmation on this would be great. Dont want to break the bolts or the threads.

And finally some pictures.
 

Attachments

See less See more
4
#4 ·
Ok, wrench on the way to me, i will get it in the afternoon.
Meanwhile, i was looking for alternative sources for head gasket. It is around 80 pounds from the UK. Desperately, contacted the hungarian dealer, he was also surprised how expensive it is for this model. Price is well over 100 pounds.
So called one of the manufactures making head gaskets based on samples. Initial price is around 20 pounds.
Anyone has experience with non OEM Triumph head gaskets? Are they any good? Any known alternative source with quality confirmation?
Thank You!
 
#163 ·
Ok, wrench on the way to me, i will get it in the afternoon.
Meanwhile, i was looking for alternative sources for head gasket. It is around 80 pounds from the UK. Desperately, contacted the hungarian dealer, he was also surprised how expensive it is for this model. Price is well over 100 pounds.
So called one of the manufactures making head gaskets based on samples. Initial price is around 20 pounds.
Anyone has experience with non OEM Triumph head gaskets? Are they any good? Any known alternative source with quality confirmation?
Thank You!
Hi. Did you purchase an aftermarket gasket? I'd be interested in an alternative to the ridiculous priced oem! Been having issues with my Super3. Thanks.
 
#5 ·
Wrench arrived, set it to 30Nm but no turning of any screws only clicks. My hope of simple retightening is gone.
Cylinder head tear down comes tomorrow.
For the radiator, i can skip it from the circuit and fill up the engine with coolant/inhibitor to prevent further corrosion until the radiator comes back from repair.
Inside of the tank looks promising after washing with solvent, flushed with water, left with citric acid solution for a few hours then washed with washing soda solution a few times. Now filled with dedicated rust remover. Half day of work and still not completely clean.
 
#10 ·
Wrench arrived, set it to 30Nm but no turning of any screws only clicks. My hope of simple retightening is gone.
If you want to try retorquing them, you need to loosen them about 1/4 turn first, then retorque. The torque required to break them loose is always higher than the torque used to tighten them. Do them one at a time, (loosen one, then re-torque it,) in the order specified in the service manual. Don't use the torque wrench to break them loose.

That said, I think the likelihood of success is negligible. It's not leaking because they loosened up, so tightening isn't likely to help.

I don't know if it will work with a wet liner engine, but we used to make head gaskets out of soft copper sheet, back in the day...
 
#6 ·
If coolant is leaking from underneath the head probably your gasket is started to despair.
After 15 years of standing head gaskets likes to rust. Mine was standing for 11 years and thanks God I decided to take off the cylinder head. Now I regret that I didn’t took pictures of damaged head gasket. Motos ODO was only 3500miles.
About bolts: can you imagine how much work it would require if any of them brake during torquing, they are working in coolant in that engine so you can just imagine how they look like after 15years of standing... I threw out my old bolts...
my one advice is: don’t take shortcuts with your bike. Anyhow I wish you good luck with that project.
 
#15 ·
Going step by step according to the factory manual... and bang! Those two head to crankcase screws at the front between the exhausts is missing from the steps. And i was wondering why i could not lift the head. Then noticed that the back is already lifting some half mm so something is keeping the head back at the front. Be careful!
I was very efficient with supporting the engine i think :) With the first height setting the head to frame screws had no restriction. the thick oak plate is supported by two car jacks.
I could not pull out 3 head bolts only remove them with the head.
Also finished cleaning the tank. You can see it drying with a hair dryer :) Added some oil after that.
Please comment on the pics, especially on the condition of the head and crankcase meeting surfaces. Is this a common sight or very bad?
Now some problems to solve. How to clean those surfaces?
How to clean the cooling jacket and the bolt holes?
Its fun to do this repair, really enjoying it :)
Some eye candy:
 

Attachments

#16 ·
Two more things. How to clean the black off the valves and head?
Head bolts were truly dirty. Just realized that they were standing in the coolant. However, after cleaning two of them i was surprised that they had only minor surface rust. Moreover, the threads were nice clean. I will check the others as well carefully.
 
#17 · (Edited)
Wow beautiful head gasket ?
I did one additional thing: I took out cylinder sleeves (thanks to that cleaning of the all the engine tricky areas was easier) I checked if any of the piston rings ware seized (and they were seized, later you need to set them up as service manual is recommending) later resealed sleeves with Hylomar (you just need to mark which sleeves goes where) it is relatively easy job if you know what you’re doing. Cylinder sleeves are not attached in any way to the rest of the engine (only glued with Hylomar) You can buy hylomar in any bmw service. They got cylinder sleeves in their cars ?
BMW part #81229400339

It’s good to do this when upper part of your engine is taken apart. Later when you notice that you have any oil leak through the piston rings or coolant leak because the cylinder sleeves are not sealed any more it gonna be bigger problem. It’s just my suggestion...
Great job so far.
 

Attachments

#20 · (Edited)
Hylomar is very hard to get here, or i am a bit unlucky because the few shops i could find are out of stock.
Have you tried at BMW dealership?
I gave you part number.
About the space between sleeves- don’t worry about it.
About cleaning the surfaces where head gasket was I used water sand paper grade around 2000 and dish sponge pads (not metal one, look attached picture) Maybe professional mechanics are using different techniques, but I’m not the professional mechanic ?
You need to be gentle with those surfaces.
 

Attachments

#22 ·
Missed it sorry ? I will call them...
Called some BMW services but they dont know what i want. In fact, if i am searching on a BMW part webshop it is listed as an "universal seal", no picture or details. Who knows what they will send? Not givin up this option, will look for more BMW databases.
Meanwhile, one guy in the car parts shops i called knew what i am searching for, although they had not one stocked but another one called Victor Reinz polyurethene which is for the same purpose. Non-hardening paste. The guy said this one is also used for cylinder liners/sleeves.
https://www.victorreinz.com/EN/Products/Sealants/REINZOSIL-and-REINZOPLAST.aspx?region
Gasket arrived :)
 

Attachments

#23 · (Edited)
Other BMW parts search for 81229400339 gives Curil T as a result.

Yes, all BMW database search gives Curil T. The good part of it that this one is on stock in the next town car shop :) I will go with this one.

Now going to clean that mess. I need to finish the bike this week. I brought my kids to my parents and i have this week off. This is the reason of the great haste :)
 
#28 ·
Ok, here is the deal. I was reading somewhere about TTY bolt reuse tolerances. Overstretching makes the bolts thinner. Checked my bolts again and found two which have uneven thickness. In particular. All other bolts having 8.90mm thickness throughout the thin part, but those two are going down to 8.82mm. Moreover, these bolts were behind cylinder 2 where cooling is not so good i think. The formula seems simple. Cooling error made this part to overheat and stretched these bolts, also resulting in coolant leak behind cylinder 2. Losing even more coolant made it worse. Now the question. What if the leaking radiator was first making coolant level low, possibly resulting in an air bubble behind cylinder 2 under the gasket? Is that possible?
Replacing these two bolts only seems to be a safe and affordable way to go.
Ok, another look at the manual. "If any of the threads or bolt head areas are damaged, replace the bolt(s)". Very confusing but as i understand this means bolt OR bolts.
Another comment. The threads and bolt heads are sound, only the yield part has a flaw. So, according the manual i could use even these again. Here is a picture of the mark at the thin part. Look for the belt around the bolt yield section.
Picture replaced.
 

Attachments

#29 ·
Measured the bolt dimensions, it seems to be a common size with M10 x 1.5mm x 176mm. Triumph is not making their own head bolts?
A set of 10 same size bolts from Victor Rheinz would cost 20 pounds.
Note: Bikebandit is listing it for the Legend TT as a M10 x 1.25mm !!!
 
#31 ·
Finally cleaned and reassembled the carbs.
However, i can not understand the manual about float adjustment. There is a gauge on the picture but the i can not see through the carb to determine the fuel level. Please help me with the fuel level determination!
I did not bend the float lever yet, all three opens and closes at the same angle.
This plastic bottle was so much of a help to clean all fuel routes.
 

Attachments

#32 ·
Connect a clear plastic tube to the bowl drain. Hold it next to the float bowl and open the drain valve. The level of fuel in the tube is the same as the level in the bowl. Or, measure from the parting surface to the bottom of the float with the tang just touching (not compressing)the tip of the float valve. (Hold the carb at an angle so the float just touches the valve - 75 degrees or so.)
 
This is an older thread, you may not receive a response, and could be reviving an old thread. Please consider creating a new thread.
Top