Triumph Rat Motorcycle Forums banner

T140 top end rebuild. Some questions !

15K views 25 replies 12 participants last post by  Mr.Pete  
#1 ·
Hello,
Some among here have seen my story, the broken top ring, the damaged head.
But it is now time for putting it all back together.
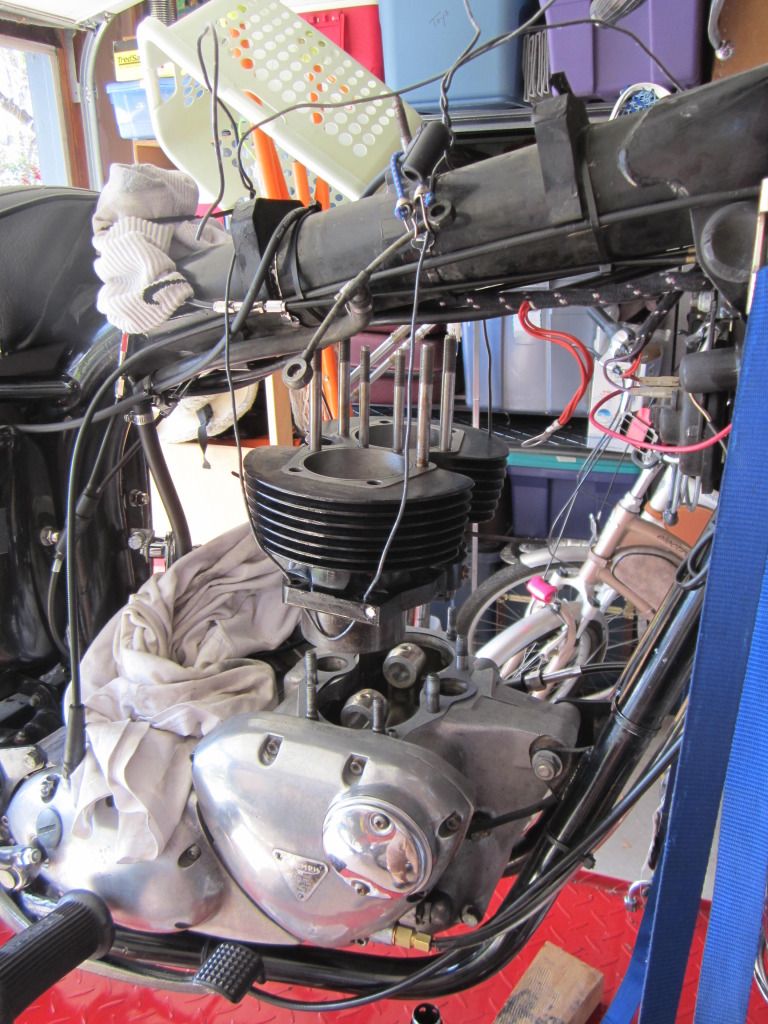
I was very challenged with the idea of tackling two pistons, six rings and the weight of the cylinder block. So I went with holding the cylinder block already fitted with the pistons / rings and raising the rods into the pistons. I got the idea from a fellow forum member here.
Image


I still wish I had someone else as getting the wire out of the way and holding everything in place was not the easiest.

I tightened all the base nuts.
Image


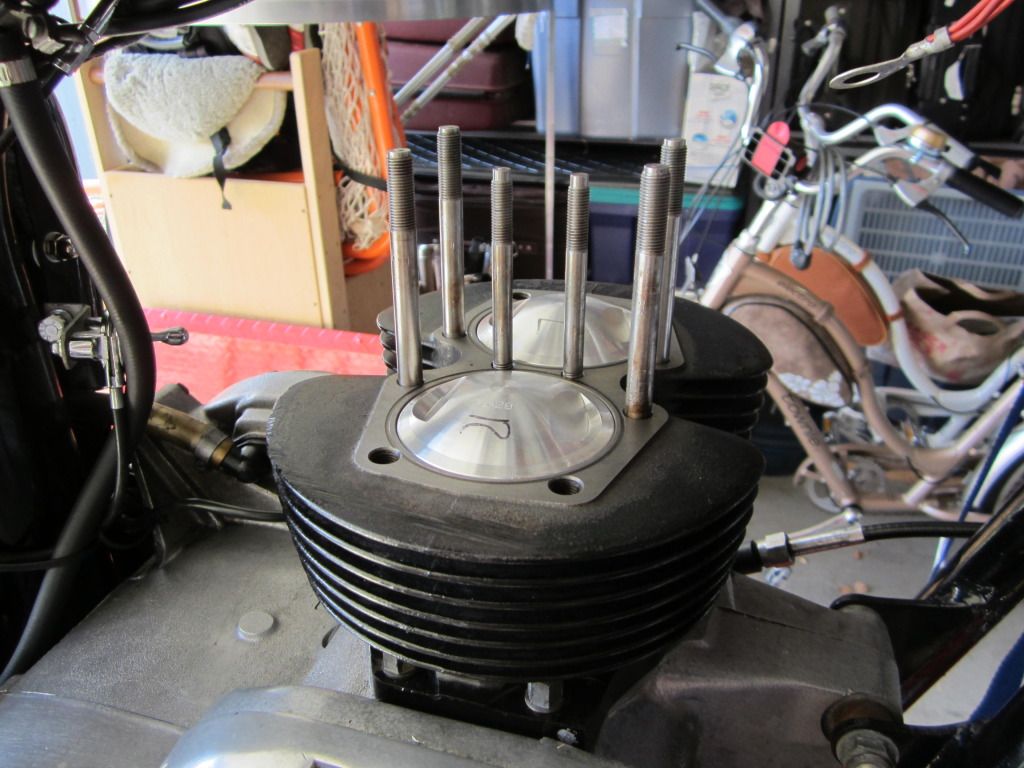
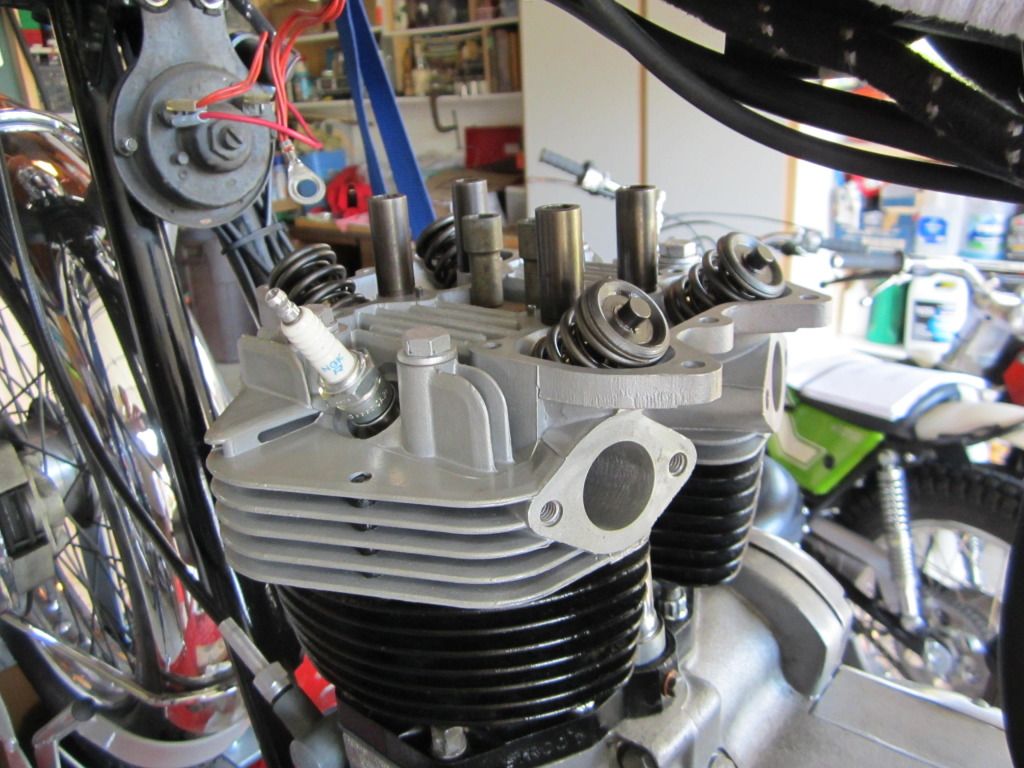
Next was to fit the pushrods' tubes, the head gasket, and the head, to check the " squish " gap left . I ended up with .045" and thought it was good enough ! The head came next and was tightened properly.
Image

Image


My first question : when it is time to recheck the torque on the head, how do you put a torque wrench on the two inner bolts ? With the rocker boxes right there, and the bracket motor to frame , it seems very tight ?

Second question : Would you ever install the rocker box's gasket dry ?

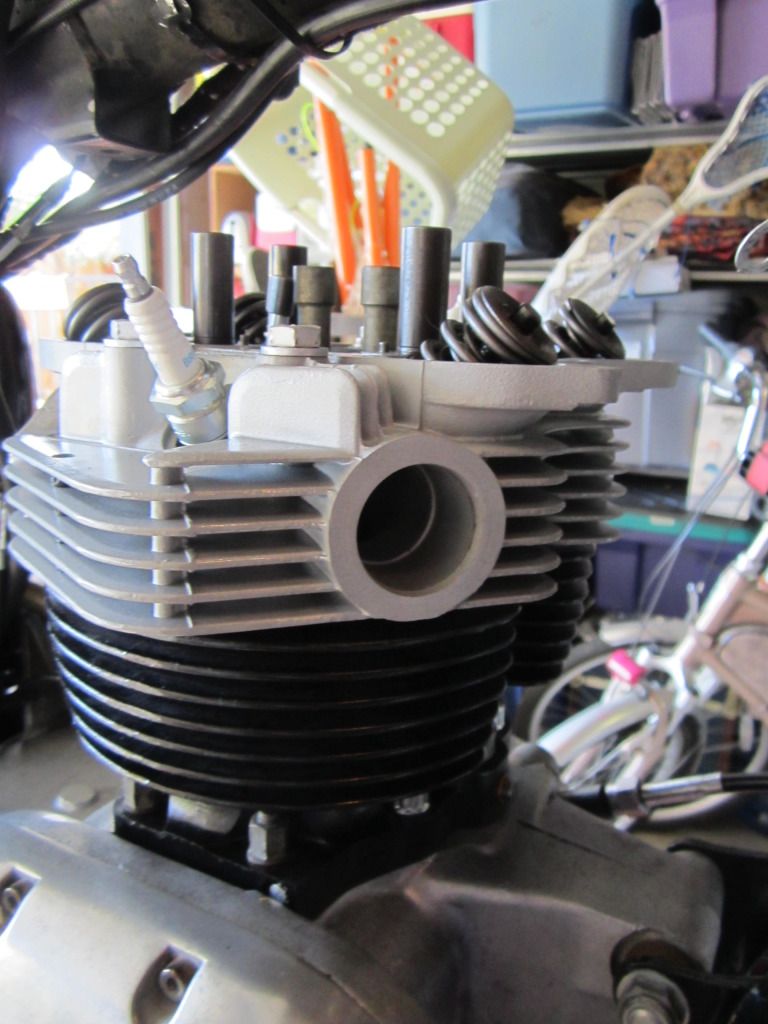
Third question : how much of a tight fit are the exhaust headers into the head ? If I remember well, they came out pretty easy with a few knocks. But as the head I now have is not the one that came off the bike, as I tried a " dry " fit, it seemed tight, like I would have to really " bang " them in there. Normal stuff ?

Thanks for your time as always.

Terry
 
#2 ·
frogon,
Your headbolts are upside down and probably don't have the 1/4" ball bearings dropped down into the bores?

Did you read that thread where this was discussed about the manual picture being wrong?

There is a new type of rockerbox gasket called "cove-seal" that has some type of foil face surface.

The original style can be a bitch to remove all the metal strands that get embedded into the alloy.

Not sure if the new cove-seal gasket can be re-used but would like to try it as have had problems with oil leaks on mine.
 
#3 ·
Hello Morris,

Man, you keep a tight ship here ! Yes I realized my studs were not at their optimum setting. In honesty, I thought I would be riding 6 weeks ago and I don't have enough time to get everything right. Makes sense ? I get one hour here and there , and I have to make the most out of it. Bob at Raber's sold me some 3M sealant and told me to use it on every gasket. His views, Triumphs will leak so do the job right from the get go, and you won't have to redo anything for a long time, including having tight seals !
Yet, I know it is such a f""""""""g pain when one has to try to remove a part that has been sealed before !!!!!
Maybe a new seal with a good sealing surface is good enough ?
No ?
 
#5 ·
Bob at Raber's sold me some 3M sealant and told me to use it on every gasket. His views, Triumphs will leak so do the job right from the get go, and you won't have to redo anything for a long time, including having tight seals !

Maybe a new seal with a good sealing surface is good enough ?
No ?
0.030" -0.040" pushrod tube seal crush is recommended.You'll probably get by with 0.045",but there's more risk of bending the head.I prefer closer to 0.030".
On a head gasket I'd only use silver paint as sealant.If the gasket is annealed,no problems,no leaks.
Dry seems to work best on cylinder base gaskets,or leave the gasket out completely and use Loctite 518 sealant.You can easily use Loctite later,if the gasket fails.No need to unbolt the head;only the rocker boxes.
Dry is good for rockerbox gaskets.I grease them to make gasket removal easier.It's not hard to fix if they ever leak.

The main thing with the inner 3/8" head studs is to use big washers;same diameter and size of washers on outer head bolts.The next main thing is don't tighten the studs tightly into the barrel.The 1/4" ball and lighty tightened (upside down studs) is the best.

It's all easy enough to sort out,if you remove the rocker boxes later.

It would be nice if the pipes were a neat fit in the head.Sometimes they aren't,and some pipe expanding helps.Silicone sealant will fill in the gaps.
 
#4 ·
Too much sealant (not very much is too much) can be far worse than not enough or even NO sealant. Too much means oozing inside and out; you don't see the inside oozing and it can get to your oil galleries and blow your engine.

Good gaskets with just a slight smear of sealer is all you need with clean, matched mating surfaces and proper torquing of fasteners.
 
#7 ·
BTW, with the wider washers now on the inner 3/8" studs, the rocker box gasket will no longer fit as is. It is required to trim it to make room for these washers. Because of that, the fancy washers with a metal insert will not work. You have to use the most basic and cheap paper washers !
Terry
 
#9 ·
I could not for the sake of me trim the fancier metal gasket. I ruined 2 gaskets in the process. I fell back on the " cheap paper gasket " and was able to do the job to make it work. What am I doing wrong here ?

I use a razor blade and a washer of the right size to trim the exes.

Let me know.

Thanks.

Terry
 
#10 · (Edited)
Image


Bike is all back together. Started on second kick ( really ! ). Ran it for 5 minutes with throttle on & off. Shut it off and once cold, re-torqued it ( it needed it ! ). Re-did the valves' gap. Tried to go on a ride....but engine was revving at 3000 rpms. Darn.
Upon refitting the gas tank, I messed up the throttle cables !
Fixed that and went for a 30 minutes ride around town and country side. It all worked good and came safely home. Bike is more oil tight than before, even if it still leaks a tiny bit from the shifter, even though I replaced the o-ring ?
So, the day went pretty well. The only thing that makes me mad is that the shop that did the work on my head and cylinders sprayed the head with some shiny stuff ( lacquer ? ) and while it did look good, it heated up badly during my ride and turned to a burned yellow color. Weird and nasty ! I will try to take it off with some acetone or stuff.

Image
 
#11 ·
I was feeling really good about your progress until I read about the coating on the head. I have never heard of such a thing. I would be on the door step of the shop demanding they fix it! :mad:

The only thing that makes me mad is that the shop that did the work on my head and cylinders sprayed the head with some shiny stuff ( lacquer ? ) and while it did look good, it heated up badly during my ride and turned to a burned yellow color. Weird and nasty ! I will try to take it off with some acetone or stuff.
 
#13 ·
At last, let's ride !


You're right. Let see the positive steps and ignore at this time the bumps along the way. It was just good to set my ass on that seat and blast away through the gears .....
Thanks for the kind and helpful messages. Even with a working bike, I am not going anywhere from this site !
Terry
 
#16 · (Edited)
Well, there it was : a BSA club organized British bike show ! And it happened to be 2 blocks from Raber's. Cool !
I went to the show for 3 hours, didn't get the kick ( or enjoyment ) I expected, as seeing mint old British bikes by the hundreds does kill the sense of being special.
On the way home , drove by Raber's. The shop was just 2 blocks away. Weird, I couldn't ignore it. I stopped by there and showed Bod the photo of my bike put back together and running. Sweet.
I also showed Bob Raber the top finish on the the head he gave me, and the fact it burned to an ugly yellow after a mild first run.
His reply : You must have over heated the engine to burn the top coat finish !
The reality of it, it was in the 60's for a very mild Northern California time. I took the bike for a 30 minutes Country ride, with speed between 2500 and 4000 rpms, between 25 and 50 miles ride. The timing is perfect, the carburation, honest, a bit too rich but almost not. No way I trashed the bike like a moron !

What I find out during this rebuilt, do REALLY your own research.
 
#19 ·
A bit. Acetone, lacquer thinner, paint thinner didn't work at all. I ended up using sandpaper by hand and the most efficient method was a sanding brush on a drill. I got the area around the spark plug pretty clean, but the rest of the fins on top and front are just out of reach for now. It doesn't look as new but it is alright for now.
Thanks.
Terry
 
#25 ·
The head was like new when it was returned to me. Any patina was long gone. So anything I do to it at this point just brings it back to that " new " state. I could paint it, but to do a good job I would need to take the head off. Don't want to do that for now.
Anyhow, for now, I have to try to repair my garage door opener as it jammed real well half-way up last night. Always something to do around a house....and a Triumph !